之前我有介绍过服务器上可以部署的一款精美简洁的监控程序uptime-kuma。可能有的同学并没有服务器也想实现监控的功能。教程,今天,它来了。 无需服务器,无需域名即可实现监控需求!
今天要介绍的这个教程是来自github开源项目UptimeFlare,这是一个更先进、无服务器且免费的正常运行时间监控和状态页面解决方案,由 Cloudflare Workers 提供支持,并配有用户友好的界面。
1 部署的前置条件
- 拥有Github账号
- 拥有CloudFlare账号.免费版即可
2 UptimeFlare特点
- 开源,部署方便,10分钟之内即可部署好,无需任何本地环境和工具
- 支持HTTP,HTTPS,TCP 检查
- 可以配置自定义状态代码和关键字检查.
- 可以自定义用户页面.
其他更详细的功能列表参考github:https://github.com/lyc8503/UptimeFlare 的首页介绍
3 部署教程
那么话不多说,GKD,直接进入部署教程.假设这里你已经拥有cf 和github账号.
1.访问链接:https://dash.cloudflare.com/profile/api-tokens ,然后点击 CREATE TOKEN.
2.选择 Edit Cloudflare Workers 模板,然后将 Account Resourses 设置为自己的账户。 ZONE Resources设置为 ALL ZONE。
3.最后点击下一步,CREATE TOKEN。 然后将Token复制下来即可。
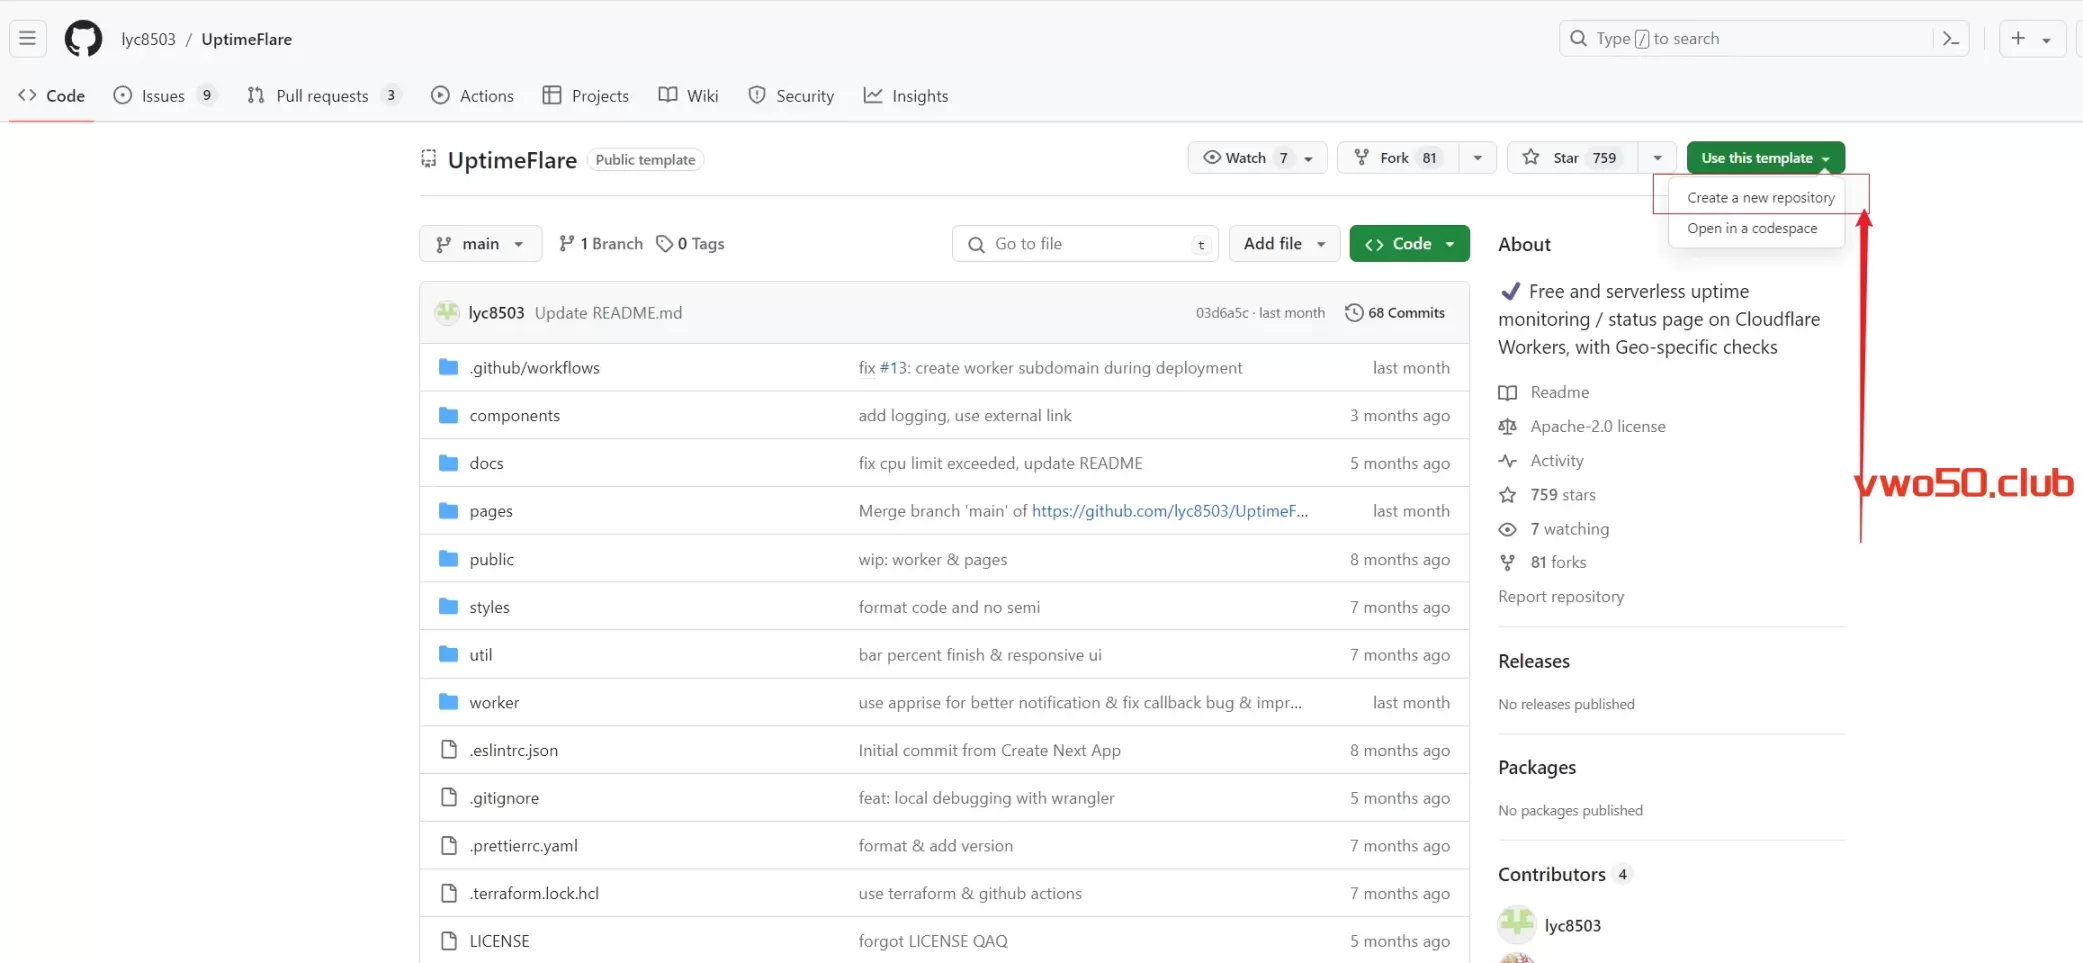
4.访问该项目的github地址:https://github.com/lyc8503/UptimeFlare 。点击项目首页的 use this template。然后点击create new repo
5.创建好之后,在该项目的设置页面。设置SCCRET 。具体为:
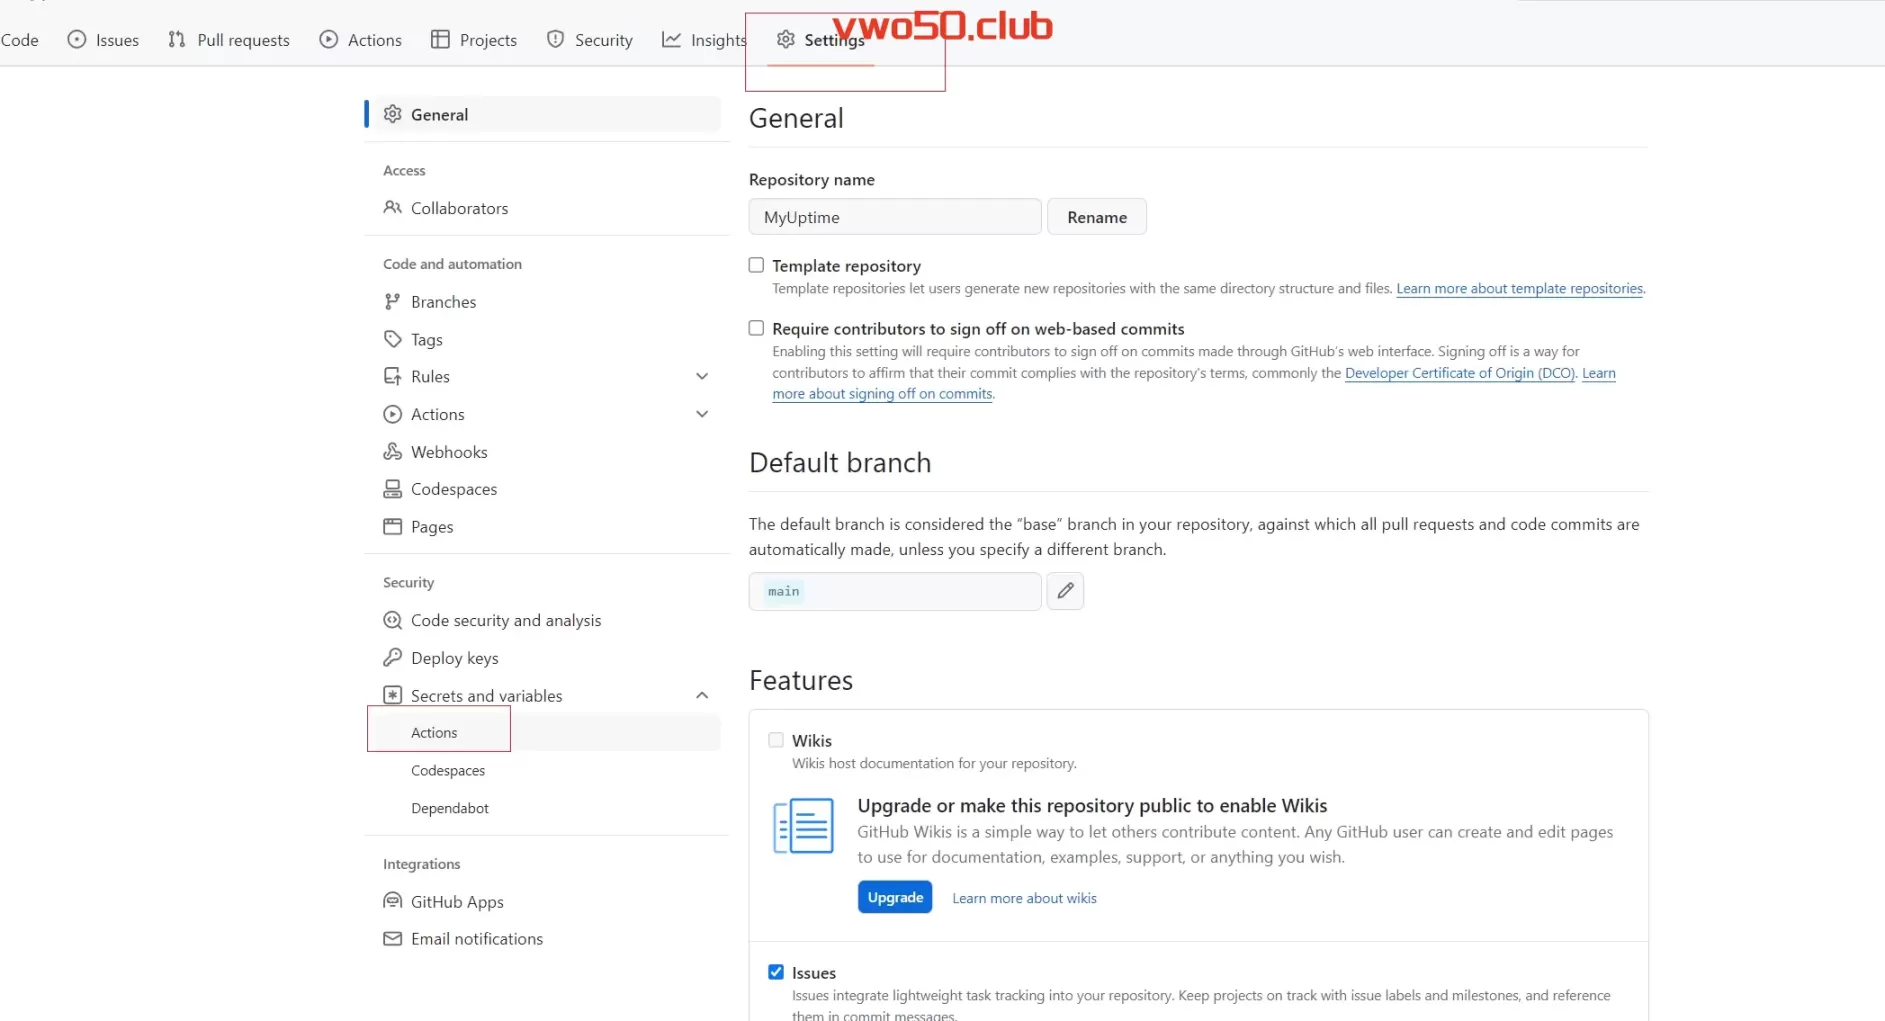
CLOUDFLARE_API_TOKEN value 是我们刚刚在CF获得的TOken值。复制该Token到 value里即可。
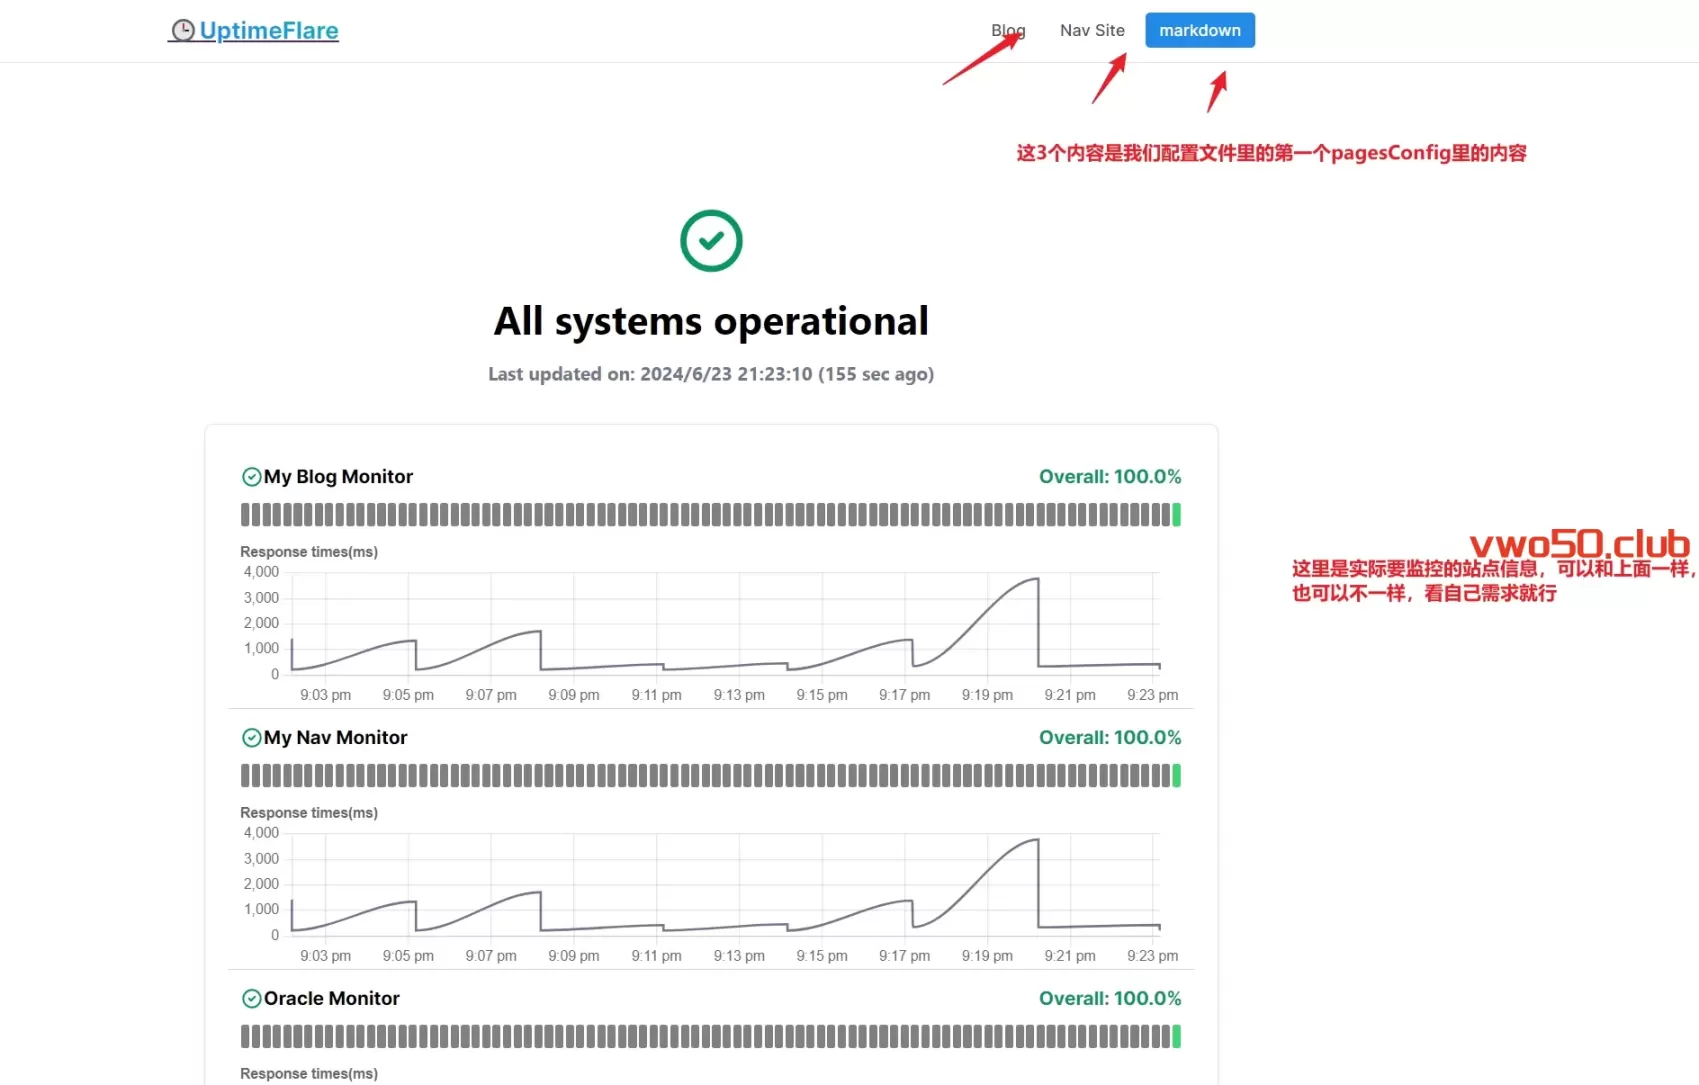
6.然后我们就需要对我们要监控的站点信息进行设置编辑。 选择我们刚刚新建的这个项目首页的 uptime.config.ts 这个配置文件里面有我们配置的站点信息以及要监控的站点信息。为了避免大家看到配置文件头疼,所以我在这里整理了一份最小配置文件。大家可以在我这个文件上修改自己的配置即可。 第一个PageConfig配置里的Links里数组里面的链接是我们该监控首页的站点显示信息。并非要监控的站点。 要监控的站点在WorkConfig里。分别是我的博客站点,导航站点 和 一台甲骨文机器的IP。大家按需改成自己的即可。
const pageConfig = {
  // Title for your status page
  title: "hxd Status Page",
  // Links shown at the header of your status page, could set `highlight` to `true`
  links: [
    { link: 'https://vwo50.club', label: 'Blog' },
    { link: 'https://u1s1.one', label: 'Nav Site' },
    { link: 'https://md.u1s1.one/', label: 'markdown', highlight: true },
  ],
}

const workerConfig = {
  kvWriteCooldownMinutes: 3,
  monitors: [
    {
      id: 'google_monitor',
      name: 'My Blog Monitor',
      method: 'GET',
      target: 'https://vwo50.club',
        tooltip: 'This is a tooltip for this monitor',
  // [OPTIONAL] `statusPageLink` is ONLY used for clickable link at status page
  statusPageLink: 'https://example.com',
    },

 {
      id: 'google_monitor',
      name: 'My Nav Monitor',
      method: 'GET',
      target: 'https://u1s1.one',
     tooltip: 'This is a tooltip for this monitor',
  // [OPTIONAL] `statusPageLink` is ONLY used for clickable link at status page
  statusPageLink: 'https://example.com',
    },

    {
      id: 'ssh_monitor',
      name: 'Oracle Monitor',
      method: 'TCP_PING',
      target: 'X.X.X.X:22',
        tooltip: 'This is a tooltip for this monitor',
  // [OPTIONAL] `statusPageLink` is ONLY used for clickable link at status page
  statusPageLink: 'https://example.com',
    },
  ],
  callbacks: {
    onStatusChange: async (
      env: any,
      monitor: any,
      isUp: boolean,
      timeIncidentStart: number,
      timeNow: number,
      reason: string,
    ) => {
      // This callback will be called when there's a status change for any monitor
      // Write any Typescript code here

      // This will not follow the grace period settings and will be called immediately when the status changes
      // You need to handle the grace period manually if you want to implement it
    },
    onIncident: async (
      env: any,
      monitor: any,
      timeIncidentStart: number,
      timeNow: number,
      reason: string,
    ) => {
      // This callback will be called EVERY 1 MINTUE if there's an on-going incident for any monitor
      // Write any Typescript code here
    },
  },
}

// Don't forget this, otherwise compilation fails.
export { pageConfig, workerConfig }
配置文件里的代码修改后,我们点击COMMIT提交之后,github actions 会自动进行流水线,运行最新的代码。当Actions里的最新作业绿了时候,证明没问题。部署成功了。若是红色,则我们需要点进去看日志是哪里报错了,进行相应的修改。

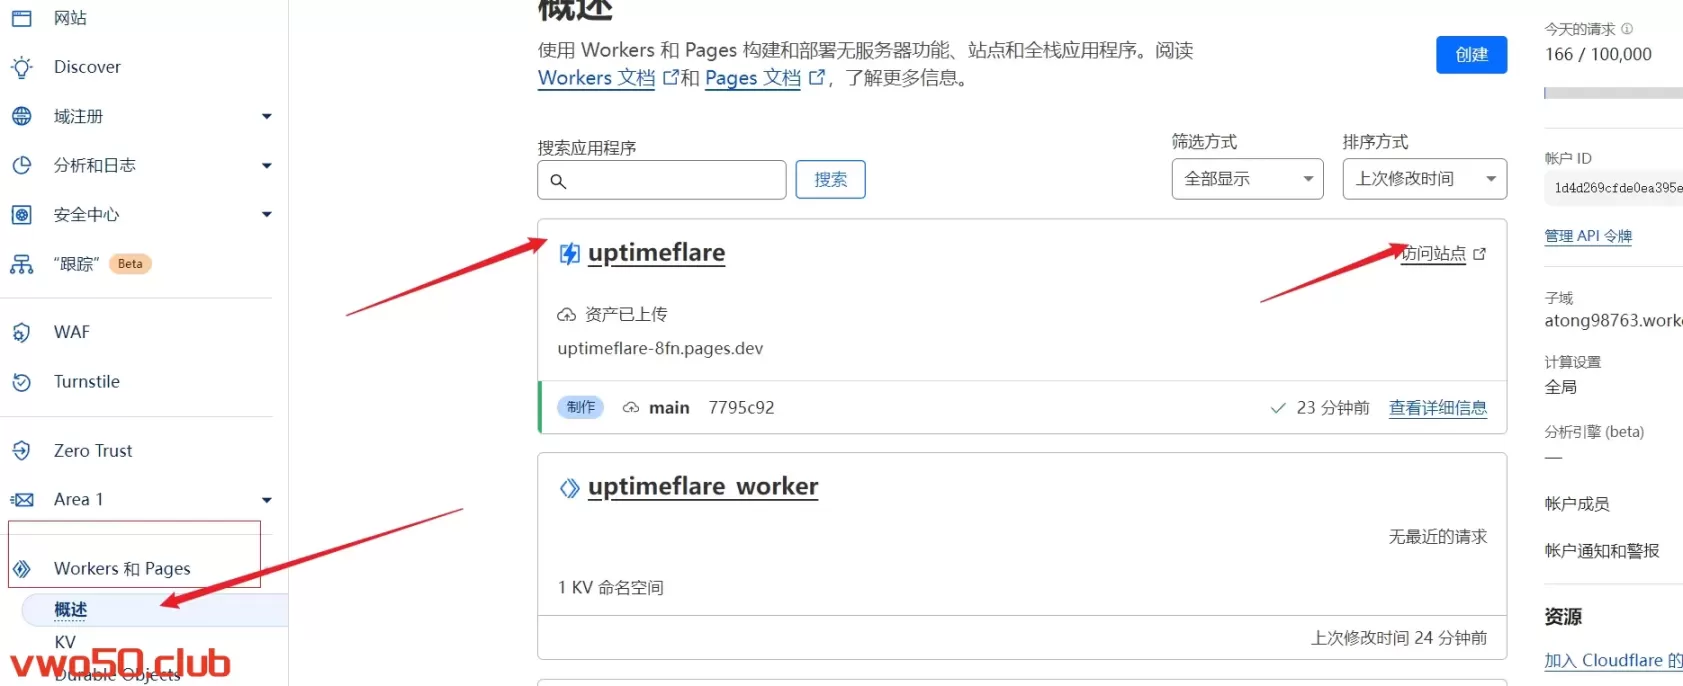
当这里部署好之后,cf 的work和pages里对应的这个uptimeflare也部署好了,我们点击访问站点即可。
访问的站点页面信息如下,部署成功了:
教程到这里还缺少一个报警相关的配置,首先报警相关的配置也要存放到uptime.config.js里面,可以放到callbacks上面。示例代码如下
notification: {
    // [Optional] apprise API server URL
    // if not specified, no notification will be sent
    appriseApiServer: "https://apprise.example.com/notify",
    // [Optional] recipient URL for apprise, refer to https://github.com/caronc/apprise
    // if not specified, no notification will be sent
    recipientUrl: "tgram://bottoken/ChatID",
    // [Optional] timezone used in notification messages, default to "Etc/GMT"
    timeZone: "Asia/Shanghai",
    // [Optional] grace period in minutes before sending a notification
    // notification will be sent only if the monitor is down for N continuous checks after the initial failure
    // if not specified, notification will be sent immediately
    gracePeriod: 5,
  },
作者在项目里介绍了2款告警通知的配置。第一种是熟悉JS的朋友可以在代码里自定义webhook。若是小白,那么作者推荐的是第三方的告警服务。也是使用Vercle一键部署之后,将对应的配置填写到 notification 里即可实现。在这里我就不多介绍了,可以参考作者教程:https://github.com/lyc8503/UptimeFlare/wiki/Setup-notification
创作不易,如果您觉得这篇文章对你有帮助,不妨给我点个赞,这将是我继续分享优质内容的动力。
